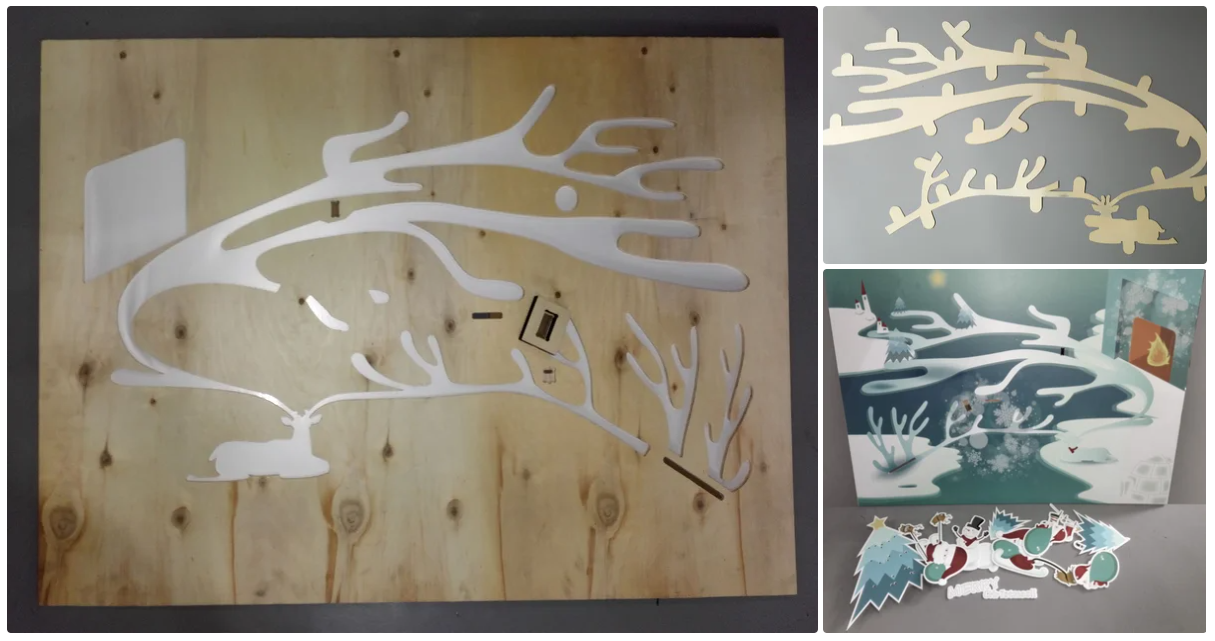
Huge Christmas Wall
This is a Huge Christmas Card about 1189mm*841mm*8mm . In this greeting card there are a lot of little tricks that have been designed. Their presence may bring you some small surprises. Now, I’ll show how to make it. If you’re interested in it, you can follow me.
Steps:
1.Prepare the following electronic modules and connect them together:
Seeeduino Lotus - ATMega328 Board with Grove Interface x 1
Digital RGB LED Flexi-Strip 60 LED - 1 Meter x 6
Grove - Sound Sensor x 1
Grove - Line Finder x 1
Grove - Relay x 1
Grove - Serial MP3 Player x 1
Grove - Button x 1
Grove - Servo x 2
EMAX ES9257 2.5kg/ .05 sec Micro Digital 3D Tail Servo x 1
2. Design the card and CNC the board
I use the software adobe Illustrator to design. The advantage of using this software is that the character or layer that needs to be added dynamic effect can be independently designed at the design time, and the contour can be extracted for laser cutting after the design is completed
Because the board was so thick, we eventually replaced the laster-cutting with CNC.
3. Make the Moving Christmas Man and the Turning Road Sign
And there are 3steps here to make the Turning Road Sign:
1) Fix the Servo with support boards and screws as illustrated in the image.
2) Paint the bamboo sticks into silver with sprayer, then glued on the road signs.
3) Fix the road sign sticks made in 1 onto the servos in 2.
4. Make the fireplace with lights and fans
there are 2 steps here to make the Christmas Man:
1) Fix the Servo on the Part1 with four boards and four screws.
2) Set up the lever linkage structure (Put three Bearing in the robot arm,and then connect each parts as instructed in the explosive view)
We took a lazy approach and bought a light fixture with flame effect on the Internet for modification. Change it to the proper size and interface.
5. Make a hidden little person
there are 3steps here:
1) Fix the Servo in the position as shown in the image.
2) Put the Santa on to it.
3) It will look like that the Santa is moving forward when the servo spin a specified angle.
6. Make the Deer God
Measure the antlers and the body, cut the lamp tape in sections according to the dimensions, then re-weld with wire. This allows the ribbon to bend along the shape of the deer.
7.Hardware Connecion
There are 4 Led strips and 3 Servos, as well as a Grove - Relay, Grove - Button.
And we have a Grove - Lotus, which has more that 12 Grove connector on board.
The connection as below:
LED1 > A2
LED2 > A0
LED3 > D3
LED4 > D2
Relay > D4
Servo1 > D6
Servo2 > D8
Servo3 > D5
8. Software Works
You can get the code from Github Page.
When you get to the github page, find a Download ZIP button, click to download the code.
The code you downloaded is not an Arduino library, it's a sketchbook, which is include all the library the project need.
Unzip the file you had downloaded from github, you will get a folder named ChristmasX-master.
Open your Arduino IDE, click File > Preferences > Sketchbook Location, browse to the folder we had mentioned above - ChristmasX-master. Then click OK to save it.
Close and re-open Arduino IDE, click File > Sketchbook > main_code, then the main code of this is open.
Choose the right board(UNO) and port to upload the code. Refer to the image above.


